2009年5月27日水曜日

Good morning!

I studied how to get a pixel data information from a image.

But I couldn't understand most it, because it's difficulty  complication and difficulty.

actually, I don't need this skill. But I need it when I extend my application "YubiFude".

In other words, I can' t extend if I solved it.

I tried solve a this code↓↓↓(included my comment)

"Returns a read-only pointer to the bytes of a CFData object."

I'll confer together

***********************************************************************************

- (void)imagePickerController:(UIImagePickerController*)picker 
  didFinishPickingImage:(UIImage*)image 
                 editingInfo:(NSDictionary*)editingInfo
{

    NSLog(@"editingInfo:%@",editingInfo);
    // UIImagePickerControllerCropRect = NSRect: {{0, 0}, {640, 425}};
  // UIImagePickerControllerOriginalImage = ;

    statusButton.hidden = NO;
    colorButton.hidden = NO;
    fillColorButton.hidden = NO;
    doneButton.hidden = NO;
    allClearButton.hidden = NO;
    layer1ClearButton.hidden = NO;
    layer2ClearButton.hidden = NO;
    layer3ClearButton.hidden = NO;
    saveButton.hidden = NO;
    loadButton.hidden = NO;
    
  // イメージピッカーを隠す
  [self dismissModalViewControllerAnimated:YES];
   
  // オリジナル画像を取得する
  UIImage* originalImage;
  originalImage = [editingInfo objectForKey:UIImagePickerControllerOriginalImage];
   
  // グラフィックスコンテキストを作る、小さくすると無理に引き延ばすのでモザイクがかかる
  CGSize size = { 320, 480 };
  UIGraphicsBeginImageContext(size);
    //Creates a bitmap-based graphics context and makes it the current context.


  // 表示する画像のサイズ
  CGRect rect;
  rect.origin = CGPointZero;//(0, 0)
  rect.size = size;
  [originalImage drawInRect:rect];
    
  // 描画した画像を取得する
  shrinkedImage = UIGraphicsGetImageFromCurrentImageContext();
    //Returns an image based on the contents of the current bitmap-based graphics context.
    

  UIGraphicsEndImageContext();
  //Removes the current bitmap-based graphics context from the top of the stack.
    

  // CGImageを取得する
  CGImageRef cgImage;
  cgImage = shrinkedImage.CGImage;
   
  // 画像情報を取得する
    //typedef __SIZE_TYPE__        __darwin_size_t;    /* sizeof() */
    //typedef __darwin_size_t        size_t;
  size_t width;//320
  size_t height;//480
  size_t bitsPerComponent;//8
  size_t bitsPerPixel;//32
  size_t bytesPerRow;//1280 = 4byte*320
  CGColorSpaceRef colorSpace;
  CGBitmapInfo bitmapInfo;//8193
  bool shouldInterpolate;//true
  CGColorRenderingIntent intent;//14081600
  width = CGImageGetWidth(cgImage);
  height = CGImageGetHeight(cgImage);
  bitsPerComponent = CGImageGetBitsPerComponent(cgImage);
  bitsPerPixel = CGImageGetBitsPerPixel(cgImage);
  bytesPerRow = CGImageGetBytesPerRow(cgImage);
  colorSpace = CGImageGetColorSpace(cgImage);
  bitmapInfo = CGImageGetBitmapInfo(cgImage);
  shouldInterpolate = CGImageGetShouldInterpolate(cgImage);//Returns the interpolation setting for a bitmap image.
  intent = CGImageGetRenderingIntent(cgImage);//Returns the rendering intent setting for a bitmap image.
                                                /*kCGRenderingIntentDefault,
                                                 kCGRenderingIntentAbsoluteColorimetric,
                                                 kCGRenderingIntentRelativeColorimetric,
                                                 kCGRenderingIntentPerceptual,
                                                 kCGRenderingIntentSaturation*/
  // データプロバイダを取得する
  CGDataProviderRef dataProvider;// which you use to move data into and out of Quartz. 
                                     // CGDataProviderRef allow you to supply Quartz functions with data.
  dataProvider = CGImageGetDataProvider(cgImage);//Returns the data provider for a bitmap image.


  // ビットマップデータを取得する
  CFDataRef data;
    //A reference to an immutable CFData object.
  UInt8* buffer;
    //typedef unsigned char UInt8;

  data = CGDataProviderCopyData(dataProvider);//data = 614400byte = 153600(320*480)*4
    //Returns a copy of the provider’s data.
    

  buffer = (UInt8*)CFDataGetBytePtr(data);
    //Returns a read-only pointer to the bytes of a CFData object.
  // ビットマップに効果を与える
     NSUInteger i, j;
     for (j = 0; j < height; j++)
     {
         for (i = 0; i < width; i++) 
         {
             // ピクセルのポインタを取得する
             UInt8* tmp;
             tmp = buffer + j * bytesPerRow + i * 4;
             //
             //NSLog(@"tmp:%d",tmp);
            // NSLog(@"buffer : %d",buffer);
             //NSLog(@"buffer : %d",&buffer);

             // RGBの値を取得する
             UInt8 r, g, b;
             r = *(tmp + 3);//b
             g = *(tmp + 2);//g
             b = *(tmp + 1);//r
        //     NSLog(@"\nr:%d\ng;%d\nb:%d",r,g,b);

     
             // 輝度値を計算する
             UInt8 y;
             y = (77 * r + 28 * g + 151 * b) / 256;//重み付きの平均値
            /* この重み付きの平均値 gray は輝度と呼ばれるもので、カラーテレビの信号処理
             に使われます。輝度は色の明るさを表します。
              重みを付けて平均を取るのは、人の視覚は赤・緑・青に対してそれぞれ感度が異
             なるためで、
             
                 青 < 赤 < 緑
             
             の順に感度が高くなります。最も感度の高い色に重みを持たせています。
             http://www.asahi-net.or.jp/~uc3k-ymd/Glib32/loadbmp.html*/
     
             // 輝度の値をRGB値として設定する
             *(tmp + 1) = y;//b
             *(tmp + 2) = y;//g
             *(tmp + 3) = y;//r
         }
    }
     
  // 効果を与えたデータを作成する
  CFDataRef effectedData;
  effectedData = CFDataCreate(NULL, buffer, CFDataGetLength(data));
   
  // 効果を与えたデータプロバイダを作成する
  CGDataProviderRef effectedDataProvider;
  effectedDataProvider = CGDataProviderCreateWithCFData(effectedData);
   
  // 画像を作成する
    // UIImage* effectedImage;
  effectedCgImage = CGImageCreate(
                                    width, height, 
                                    bitsPerComponent, bitsPerPixel, bytesPerRow, 
                                    colorSpace, bitmapInfo, effectedDataProvider, 
                                    NULL, shouldInterpolate, intent);
    //Creates a bitmap image from data supplied by a data provider.
    /*size_t width,
    size_t height,
    size_t bitsPerComponent,
    size_t bitsPerPixel,
    size_t bytesPerRow,
    CGColorSpaceRef colorspace,
    CGBitmapInfo bitmapInfo,
    CGDataProviderRef provider,
    const CGFloat decode[],
    bool shouldInterpolate,
    CGColorRenderingIntent intent
    );*/
    // effectedImage = [[UIImage alloc] initWithCGImage:effectedCgImage];
    // [effectedImage autorelease];
   
  // 画像を表示する
    // _imageView.image = effectedImage;

  [PaintingView loadImage];
  // 作成したデータを解放する
  CGImageRelease(effectedCgImage);
  CFRelease(effectedDataProvider);
  CFRelease(effectedData);
  CFRelease(data);
    [[UIApplication sharedApplication] setStatusBarHidden:YES];

    self.navigationController.navigationBarHidden = YES;
}

***********************************************************************************

This code is invoked when pushed UIImagePickerController's choose button.

I could understand theacceptation most of code.But  I didn't understand this code 

  buffer = (UInt8*)CFDataGetBytePtr(data);

,,,,,,what isCFDataGetBytePtr??

According to reference,,,

"Returns a read-only pointer to the bytes of a CFData object."

I'll talk to my togeher about this code at tomorrow.

And I don't complete the concept the "pointer".

I'll talk to teacher about it too.

I'd like to complete it tommorow.


***********************************************************************

"We have only more 12 days to go before the deadline."
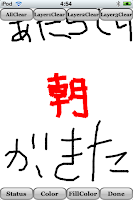
***********************************************************************


2009年5月26日火曜日

Good morning everyone !

I fixed and did analysis of the my native application "YubiFude".

I fixed problem about an algorithm (order of drawing to specified layer).

I completed it. CGLayer objects are good working now.


I did analysis of code of the "YubiFude" application about save and import a image.

It's complication for me.

I don't understand some of this. therefore I'll study it.

But becouse of I could understand some of this, I post the code with comment.

*******************************************************************************

//**********************************************************************
//*******************↓↓↓Save Image to library↓↓↓************************
//**********************************************************************

- (void)saveViewToPhotoLibrary:(id)sender {
    
  CGRect screenRect = [[UIScreen mainScreen] bounds];
    //↑↑↑get the size of window(w:320 h:480)
  UIGraphicsBeginImageContext(screenRect.size);
    //↑↑↑Creates a bitmap-based graphics context and makes it the current context.
    // The drawing environment is pushed onto the graphics context stack immediately.
  CGContextRef ctx = UIGraphicsGetCurrentContext();
    //Returns the current graphics context.ビットマップコンテキストの収集
    //[[UIColor blackColor] set];
  CGContextFillRect(ctx, screenRect);
    //↑↑↑Paints the area contained within the provided rectangle, using the fill color in the current graphics state.
    
  [self.paintingViewController.view.layer renderInContext:ctx];
    //↑↑↑Renders the receiver and its sublayers into the specified context.
    //UIView class has a layer property.It is a CALayer class object 
   
  UIImage *screenImage = UIGraphicsGetImageFromCurrentImageContext();
    //↑↑↑Returns an image based on the contents of the current bitmap-based graphics context.
    
  UIImageWriteToSavedPhotosAlbum(screenImage, 
                                 nil//The object whose selector should be called after the image has been written to the user’s device.
                                 , nil//The selector of the target object to call. This method should be of the form:                        
                                 , nil//An optional pointer to any context-specific data that you want passed to the completion selector.
    );
    //↑↑↑Adds the specified image to the user’s Saved Photos album.
    
  UIGraphicsEndImageContext();    
    //↑↑↑Removes the current bitmap-based graphics context from the top of the stack.
}
//**********************************************************************
//*******************↑↑↑Save Image to library↑↑↑************************
//**********************************************************************


*******************************************************************************
//↓↓↓pushed a loadButton
- (void)showCameraSheet:(id)sender
{
    statusButton.hidden = YES;
    colorButton.hidden = YES;
    fillColorButton.hidden = YES;
    doneButton.hidden = YES;
    allClearButton.hidden = YES;
    layer1ClearButton.hidden = YES;
    layer2ClearButton.hidden = YES;
    layer3ClearButton.hidden = YES;
    saveButton.hidden = YES;
    loadButton.hidden = YES;
    
  // アクションシートを作る:下から出てくるアラートみたいなやつ
  UIActionSheet* sheet;
  sheet = [[UIActionSheet alloc] 
             initWithTitle:@"Add image to current layer" 
             delegate:self 
             cancelButtonTitle:nil 
             destructiveButtonTitle:nil 
             otherButtonTitles:@"Photo Library", @"Saved Photos",@"Cancel" ,nil];
  [sheet autorelease];
    [sheet showInView:self.view];
    
}

- (void)actionSheet:(UIActionSheet*)actionSheet clickedButtonAtIndex:(NSInteger)buttonIndex
{
  // ボタンインデックスをチェックする、どのボタン押された?
  if (buttonIndex >= 3) {
  return;
  }
    UIImagePickerControllerSourceType sourceType = 0;
  switch (buttonIndex) {
        case 0: {
            sourceType = UIImagePickerControllerSourceTypePhotoLibrary;
            // イメージピッカーを作る
            UIImagePickerController* imagePicker;
            imagePicker = [[UIImagePickerController alloc] init];
            [imagePicker autorelease];
            imagePicker.sourceType = sourceType;
            imagePicker.allowsImageEditing = YES;
            imagePicker.delegate = self;
            
            // イメージピッカーを表示する、写真選ぶ画面
            //モーダルな◆ユーザが応答しない限り、そのプログラムの他のコントロールは入力を受け付けない
            [self presentModalViewController:imagePicker animated:YES];
            
            
            break;
        }
        case 1: {
            sourceType = UIImagePickerControllerSourceTypePhotoLibrary;
            // イメージピッカーを作る
            UIImagePickerController* imagePicker;
            imagePicker = [[UIImagePickerController alloc] init];
            [imagePicker autorelease];
            imagePicker.sourceType = sourceType;
            imagePicker.allowsImageEditing = YES;
            imagePicker.delegate = self;
            
            // イメージピッカーを表示する
            [self presentModalViewController:imagePicker animated:YES];
            
            break;
        }
        case 2: {//自作キャンセルボタン、デフォルトだとメソッド追加命令不可能
            statusButton.hidden = NO;
            colorButton.hidden = NO;
            fillColorButton.hidden = NO;
            doneButton.hidden = NO;
            allClearButton.hidden = NO;
            layer1ClearButton.hidden = NO;
            layer2ClearButton.hidden = NO;
            layer3ClearButton.hidden = NO;
            saveButton.hidden = NO;
            loadButton.hidden = NO;
            
            [self dismissModalViewControllerAnimated:YES];
            //ModalViewControllerの除去
            break;
        }
            
  }
   
  // 使用可能かどうかチェックする(カメラはipodtouchにはないので)
  if (![UIImagePickerController isSourceTypeAvailable:sourceType]) {
        //Returns a Boolean value indicating whether the device supports picking images using the specified source.
  return;
  }
}

- (void)imagePickerController:(UIImagePickerController*)picker 
  didFinishPickingImage:(UIImage*)image 
                 editingInfo:(NSDictionary*)editingInfo
{
    NSLog(@"editingInfo:%@",editingInfo);
    // UIImagePickerControllerCropRect = NSRect: {{0, 0}, {640, 425}};
  // UIImagePickerControllerOriginalImage = ;

    statusButton.hidden = NO;
    colorButton.hidden = NO;
    fillColorButton.hidden = NO;
    doneButton.hidden = NO;
    allClearButton.hidden = NO;
    layer1ClearButton.hidden = NO;
    layer2ClearButton.hidden = NO;
    layer3ClearButton.hidden = NO;
    saveButton.hidden = NO;
    loadButton.hidden = NO;
    
  // イメージピッカーを隠す
  [self dismissModalViewControllerAnimated:YES];
   
  // オリジナル画像を取得する
  UIImage* originalImage;
  originalImage = [editingInfo objectForKey:UIImagePickerControllerOriginalImage];
   
  // グラフィックスコンテキストを作る、小さくすると無理に引き延ばすのでモザイクがかかる
  CGSize size = { 320, 480 };
  UIGraphicsBeginImageContext(size);
    //Creates a bitmap-based graphics context and makes it the current context.


  // 画像を縮小して描画する
  CGRect rect;
  rect.origin = CGPointZero;
  rect.size = size;
  [originalImage drawInRect:rect];
  // 描画した画像を取得する
  shrinkedImage = UIGraphicsGetImageFromCurrentImageContext();
  UIGraphicsEndImageContext();
   
  // CGImageを取得する
  CGImageRef cgImage;
  cgImage = shrinkedImage.CGImage;
   
  // 画像情報を取得する
  size_t width;
  size_t height;
  size_t bitsPerComponent;
  size_t bitsPerPixel;
  size_t bytesPerRow;
  CGColorSpaceRef colorSpace;
  CGBitmapInfo bitmapInfo;
  bool shouldInterpolate;
  CGColorRenderingIntent intent;
  width = CGImageGetWidth(cgImage);
  height = CGImageGetHeight(cgImage);
  bitsPerComponent = CGImageGetBitsPerComponent(cgImage);
  bitsPerPixel = CGImageGetBitsPerPixel(cgImage);
  bytesPerRow = CGImageGetBytesPerRow(cgImage);
  colorSpace = CGImageGetColorSpace(cgImage);
  bitmapInfo = CGImageGetBitmapInfo(cgImage);
  shouldInterpolate = CGImageGetShouldInterpolate(cgImage);//Returns the interpolation setting for a bitmap image.
  intent = CGImageGetRenderingIntent(cgImage);//Returns the rendering intent setting for a bitmap image.
   
  // データプロバイダを取得する
  CGDataProviderRef dataProvider;
  dataProvider = CGImageGetDataProvider(cgImage);//Returns the data provider for a bitmap image.


  // ビットマップデータを取得する
  CFDataRef data;
  UInt8* buffer;
  data = CGDataProviderCopyData(dataProvider);
  buffer = (UInt8*)CFDataGetBytePtr(data);
  // ビットマップに効果を与える
    /* NSUInteger i, j;
     for (j = 0; j < height; j++) {
     for (i = 0; i < width; i++) {
     // ピクセルのポインタを取得する
     UInt8* tmp;
     tmp = buffer + j * bytesPerRow + i * 4;
     
     // RGBの値を取得する
     UInt8 r, g, b;
     r = *(tmp + 3);
     g = *(tmp + 2);
     b = *(tmp + 1);
     
     // 輝度値を計算する
     UInt8 y;
     y = (77 * r + 28 * g + 151 * b) / 256;
     
     // 輝度の値をRGB値として設定する
     *(tmp + 1) = y;
     *(tmp + 2) = y;
     *(tmp + 3) = y;
     }
     }
     */
  // 効果を与えたデータを作成する
  CFDataRef effectedData;
  effectedData = CFDataCreate(NULL, buffer, CFDataGetLength(data));
   
  // 効果を与えたデータプロバイダを作成する
  CGDataProviderRef effectedDataProvider;
  effectedDataProvider = CGDataProviderCreateWithCFData(effectedData);
   
  // 画像を作成する
    // UIImage* effectedImage;
  effectedCgImage = CGImageCreate(
                                    width, height, 
                                    bitsPerComponent, bitsPerPixel, bytesPerRow, 
                                    colorSpace, bitmapInfo, effectedDataProvider, 
                                    NULL, shouldInterpolate, intent);
    // effectedImage = [[UIImage alloc] initWithCGImage:effectedCgImage];
    // [effectedImage autorelease];
   
  // 画像を表示する
    // _imageView.image = effectedImage;

  [PaintingView loadImage];
  // 作成したデータを解放する
  CGImageRelease(effectedCgImage);
  CFRelease(effectedDataProvider);
  CFRelease(effectedData);
  CFRelease(data);
}

- (void)imagePickerControllerDidCancel:(UIImagePickerController*)picker
{
  // イメージピッカーを隠す
  [self dismissModalViewControllerAnimated:YES];
}

*****************************************************************************


2009年5月25日月曜日

Good morning!

My head is tired...,, because I used my brain hard.


I could load a image of the library to CGLayer object.

********************************************************************

First, load the  image of the  library to UIImage object.

Second, import theUIImage object to CGImageRef type object.

It uses a "CGImage" property of UIImage. ↓↓↓↓↓↓

  CGImageref  = UIImage.CGImage;

Third,  import the CGImageref object image toCGContextRef type object.

It uses this function↓↓↓↓

     CGContextRef = CGLayerGetContext(CGLayerRef);


    CGContextDrawImage(CGContextRef, bounds, CGImageRef);

********************************************************************

It is Completed the import image of library.

But it has a poblem.(↓↓↓iPhone OS programming Guide)


I fixed it by refered to this.

I coomlete the most of  the "YubiFude"application.

But I don't understand some feature and algorithm of  the "YubiFide" application (ex. Import the image of library ).

Therefore, I'll study code of  the "YubiFude" application.


2009年5月24日日曜日

Good morning!


I studied the "YubiFude" application.

I could save the image of PaintingView(UIView class)

and imported image in the photo liblary to the PaintingView(but not complete)

 and changed the value of color and fill color (0.0~1.0→0~255).

I save image of the PaintingView by reffered to this.

 ******code ******

- (void)saveViewToPhotoLibrary:(id)sender {
 
  CGRect screenRect = [[UIScreen mainScreen] bounds];
 //↑↑↑get the size of window:
  UIGraphicsBeginImageContext(screenRect.size);
 //↑↑↑Creates a bitmap-based graphics context and makes it the current context.
 
  CGContextRef ctx = UIGraphicsGetCurrentContext();

  CGContextFillRect(ctx, screenRect);
 //↑↑↑Paints the area contained within the provided rectangle, using the fill color in the current graphics state.
 
  [self.paintingViewController.view.layer renderInContext:ctx];
 //↑↑↑Renders the receiver and its sublayers into the specified context.
 //UIView class has a layer property.It is a CALayer class object  
   
  UIImage *screenImage = UIGraphicsGetImageFromCurrentImageContext();
 //↑↑↑Returns an image based on the contents of the current bitmap-based graphics context.
 
  UIImageWriteToSavedPhotosAlbum(screenImage, nil, nil, nil);
 //↑↑↑Adds the specified image to the user’s Saved Photos album.
 
  UIGraphicsEndImageContext();  
 //↑↑↑Removes the current bitmap-based graphics context from the top of the stack.
}
***************

Therefore, I could do it.

I could import image in the photo liblary to the PaintingView.

But It's not complete yet.

It is difficulty problem here. ,,, layer problem,,,?

I don't know it well.

Therefore, I'll understand it at tomorrow.
 

2009年5月23日土曜日

Good morning!

I made a presentation about my pursuit (main of pursuit is development of the "YubiFude" application) today, because Apple company members came to 2132 room.

 I developed the "YubiFude" application today.

Contents of developed the it↓↓↓

*I complete the feature of zoom in.

*I hid the task bar and I could use the wide screen for drawing.

*I added the animation of UISlider. It's invoked when color button is pushed.

*I almost complete the design(GUI) of "YubiFude".

Zoom in feature is used these code↓↓↓

******************************************************************

  CGAffineTransform translate = CGAffineTransformMake(2.0, 0.0, 0.0, 2.0, 160-location.x, 240-location.y); 
  [self setTransform:translate];

******************************************************************

UIView has a property "translate". It can use various translation of the UIView.

CGAffineTransformMake function is a translate the UIView object by 6 arguments.


Zoom feature was completed. but I'd like to learn "Affine transform".

I think complete the "Quartz2D" by complete the "Affine transform"

I hid the task bar by added contents of "Info.plist" .

*place of blue row.


When I hid the task bar, I got the error of iPhone simulator.

I can't draw to space of task bar was existed in iPhone simulator.

but I can it in device.

←in simulator←in device


I added the animation to the UISlider. 

Probably, you can not understand it by the screen shot image.

I almost complete the design(GUI) of "YubiFude".

I change the GUI of "YubiFude". It's includ the UISlider animation.


2009年5月22日金曜日

Good morning!?

Today's contents

* I developed the "YubiFude" application.

* I prepared the my presentation.

I added a feature to "YubiFude" application.

It's zoom up view. 


I used a function "self.transform = CGAffineTransformMakeScale(3.0, 3.0);" for I added feature.

But It's not completed.

I couldn't control a clipped placement.

I'll fix it tomorrow.


I prepare the my presentation because apple company member comes MacRoom and I have to
presentation tomorrow.

2009年5月21日木曜日


Good morning!

I solved yesterday's problem today.

Yesterday's problem is I can hide the 4 buttons but 4 buttons not.

I declared the UIButton object above the @Interface in file(RootViewController:UIViewController).

I declared it below the @Interface in file until yesterday.

I could use those objects in other class(PaintingViewController:UIViewController).

I think most of the "YubiFude" application was completed.

I'll study new feature of iPhoneOS3.0 until WWDC2009 started.

↓↓↓↓↓↓↓↓↓↓↓↓↓↓↓I solved problem↓↓↓↓↓↓↓↓↓↓↓↓↓↓↓↓↓↓